An ammonia chiller had been found to need an evaporator repair on a previous call out. The water Inlet and Outlet to the plate evaporator had been valved off and then it had been drained down. This was to stop any further leaking of water into the refrigerant system.
News Article No.30
Equipment
The plant is located on a roof, so the pump out unit and recovery cylinders were lifted into place with a block and tackle. These in place, the extension lead was run out from the adjacent plant room. Having done this, the recovery unit was plugged in and tested.
Ammonia Pump Out during Chiller Repair
The refrigerant recovery operation was started by removing the ammonia liquid. Then, the vapour was removed until the pressure was zero barg. By this time, the refrigerant temperature had risen to near ambient temperature.
Oil Drain Down
The oil used to lubricate the compressor is located in the:
• Oil separator
• Oil cooler
• Economiser pot
• Oil supply pipe.
Therefore, it was drained from the various service ports into drums and then taken away for recycling.
Breaking into the System
Our engineers then decided to break into the refrigerant system. They both donned their breathing apparatus and full ammonia resistant PPE. First, the refrigerant hoses were removed from the pump out unit. They then opened all of the service valves around the chiller.
Leaking Plates
The evaporator on this chiller is a plate heat exchanger. The leak had been identified as coming from in between the plates along the side of the evaporator. An attempt had been made to ‘nip’ the evaporator up by tightening the end plate bolts. This had not made any difference to how fast the leak was occurring.
0161 237 3727
service@maximuschillers.com
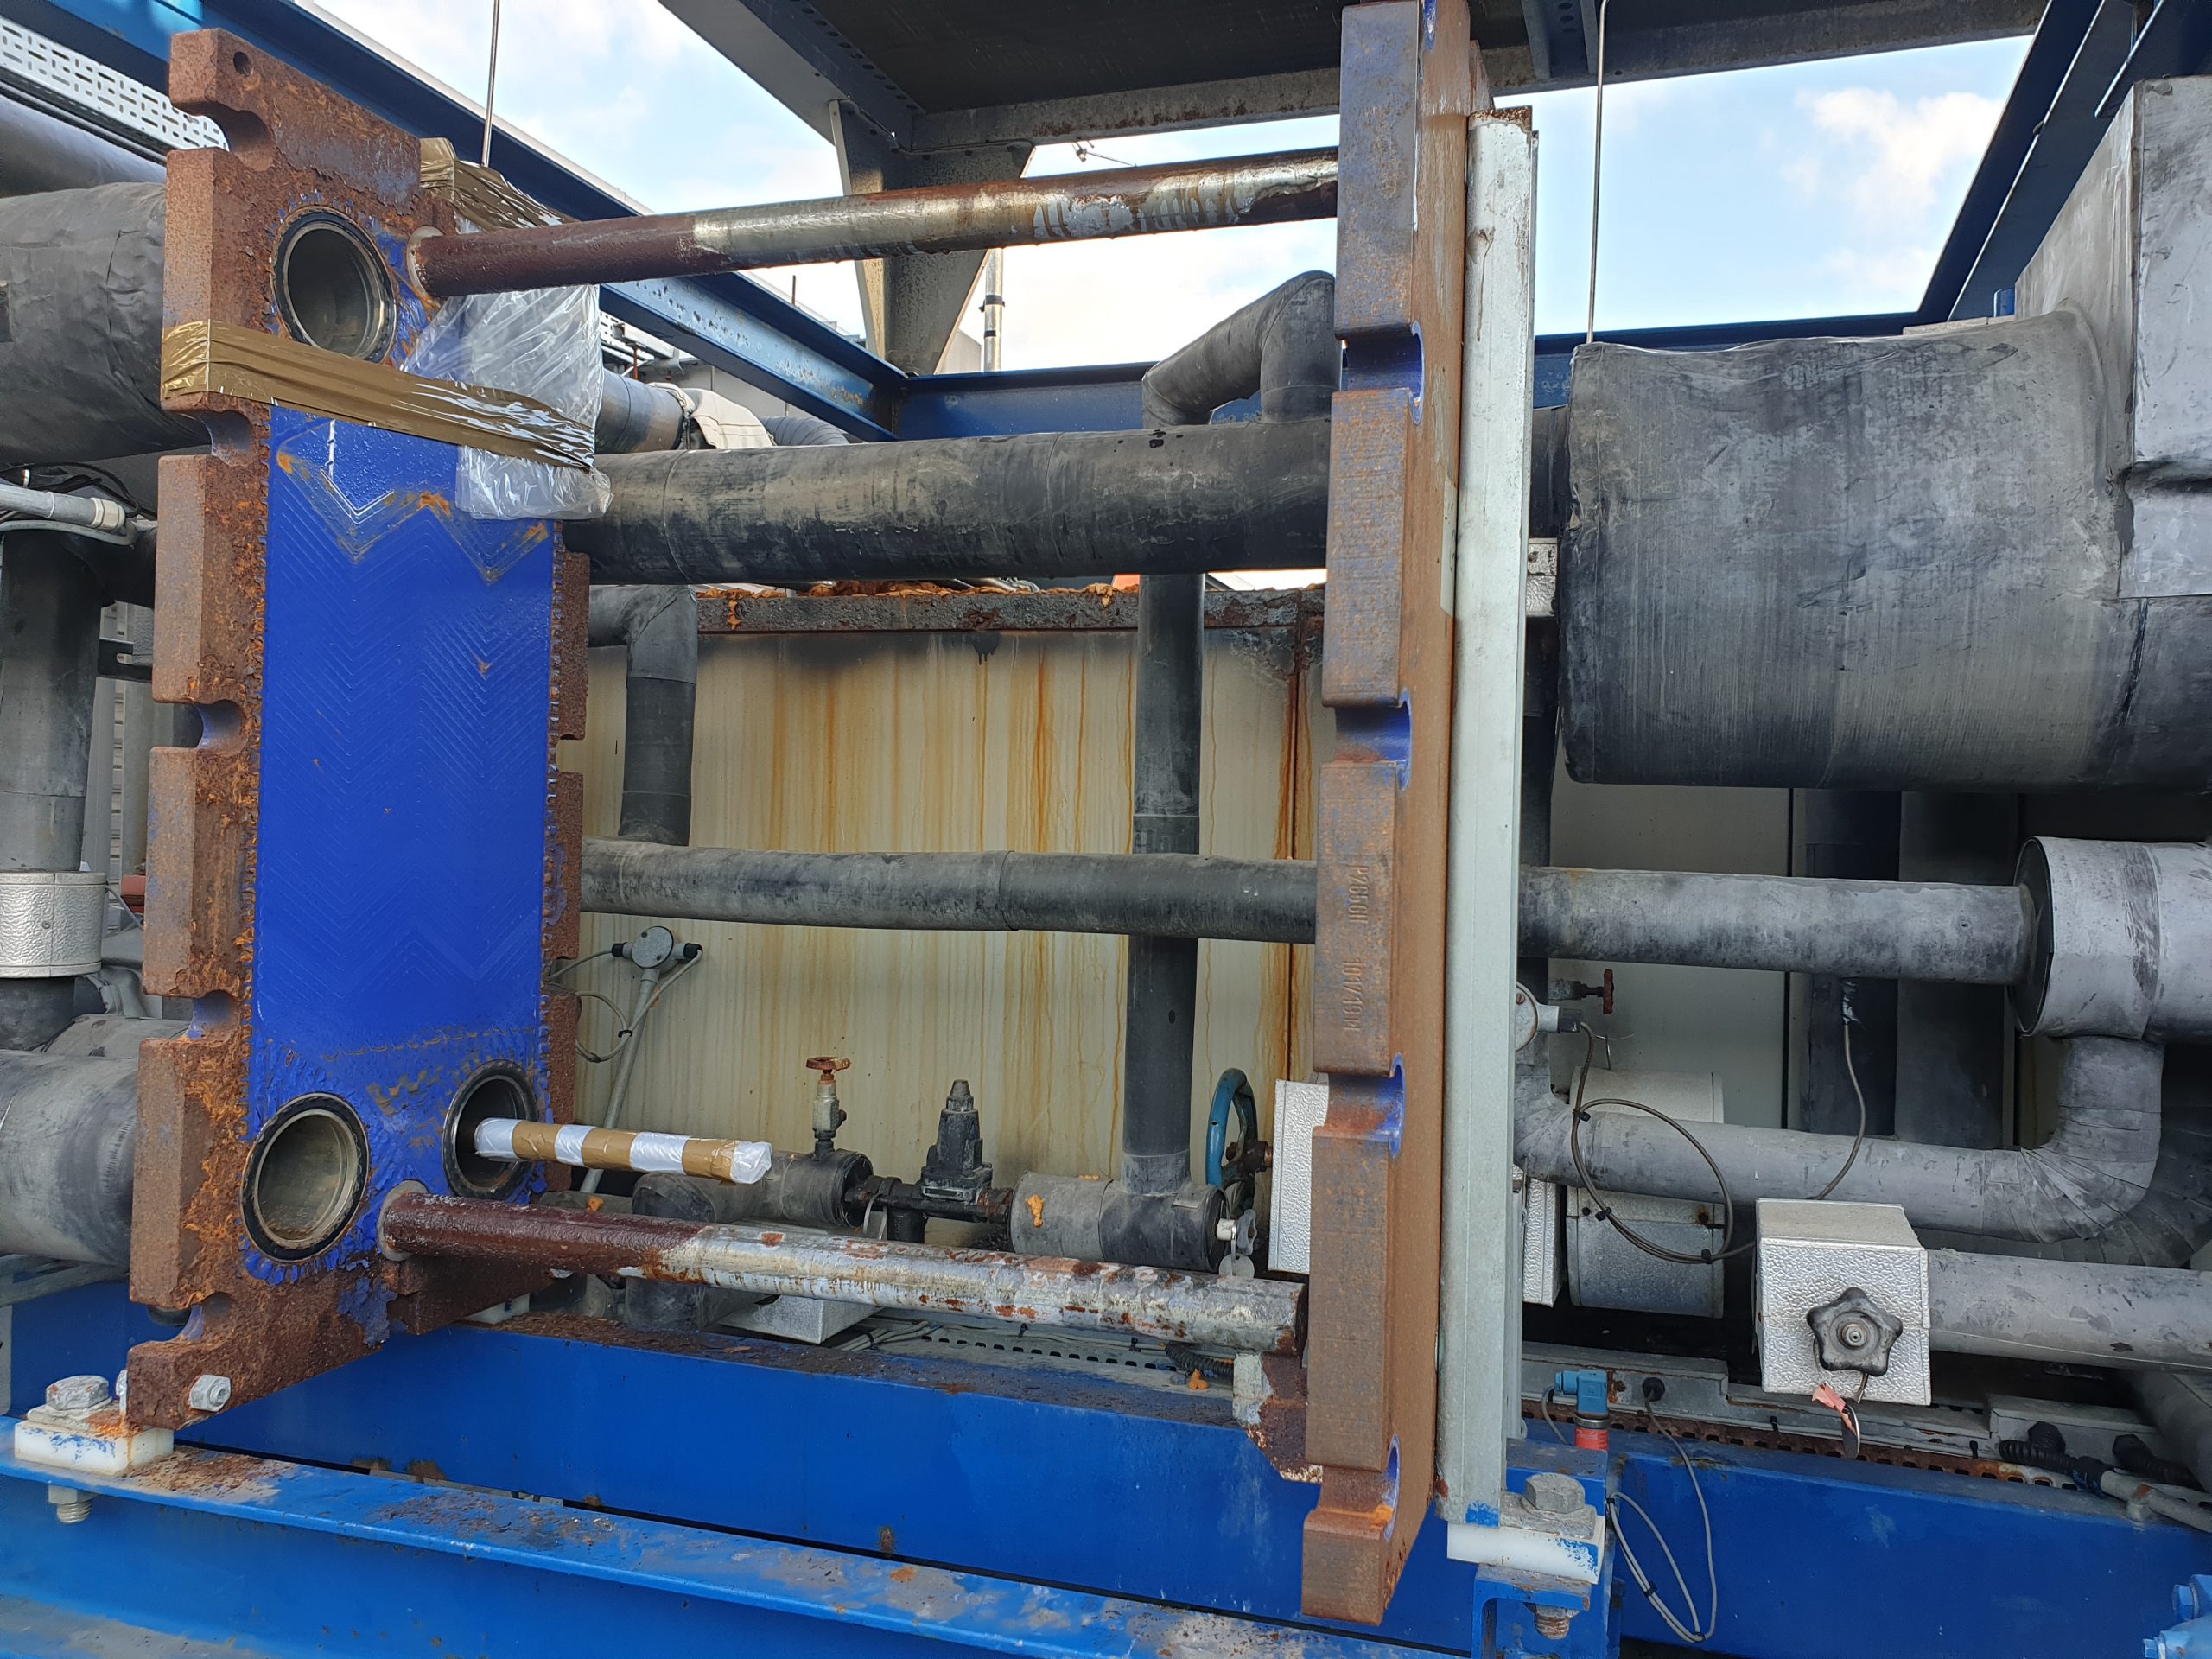
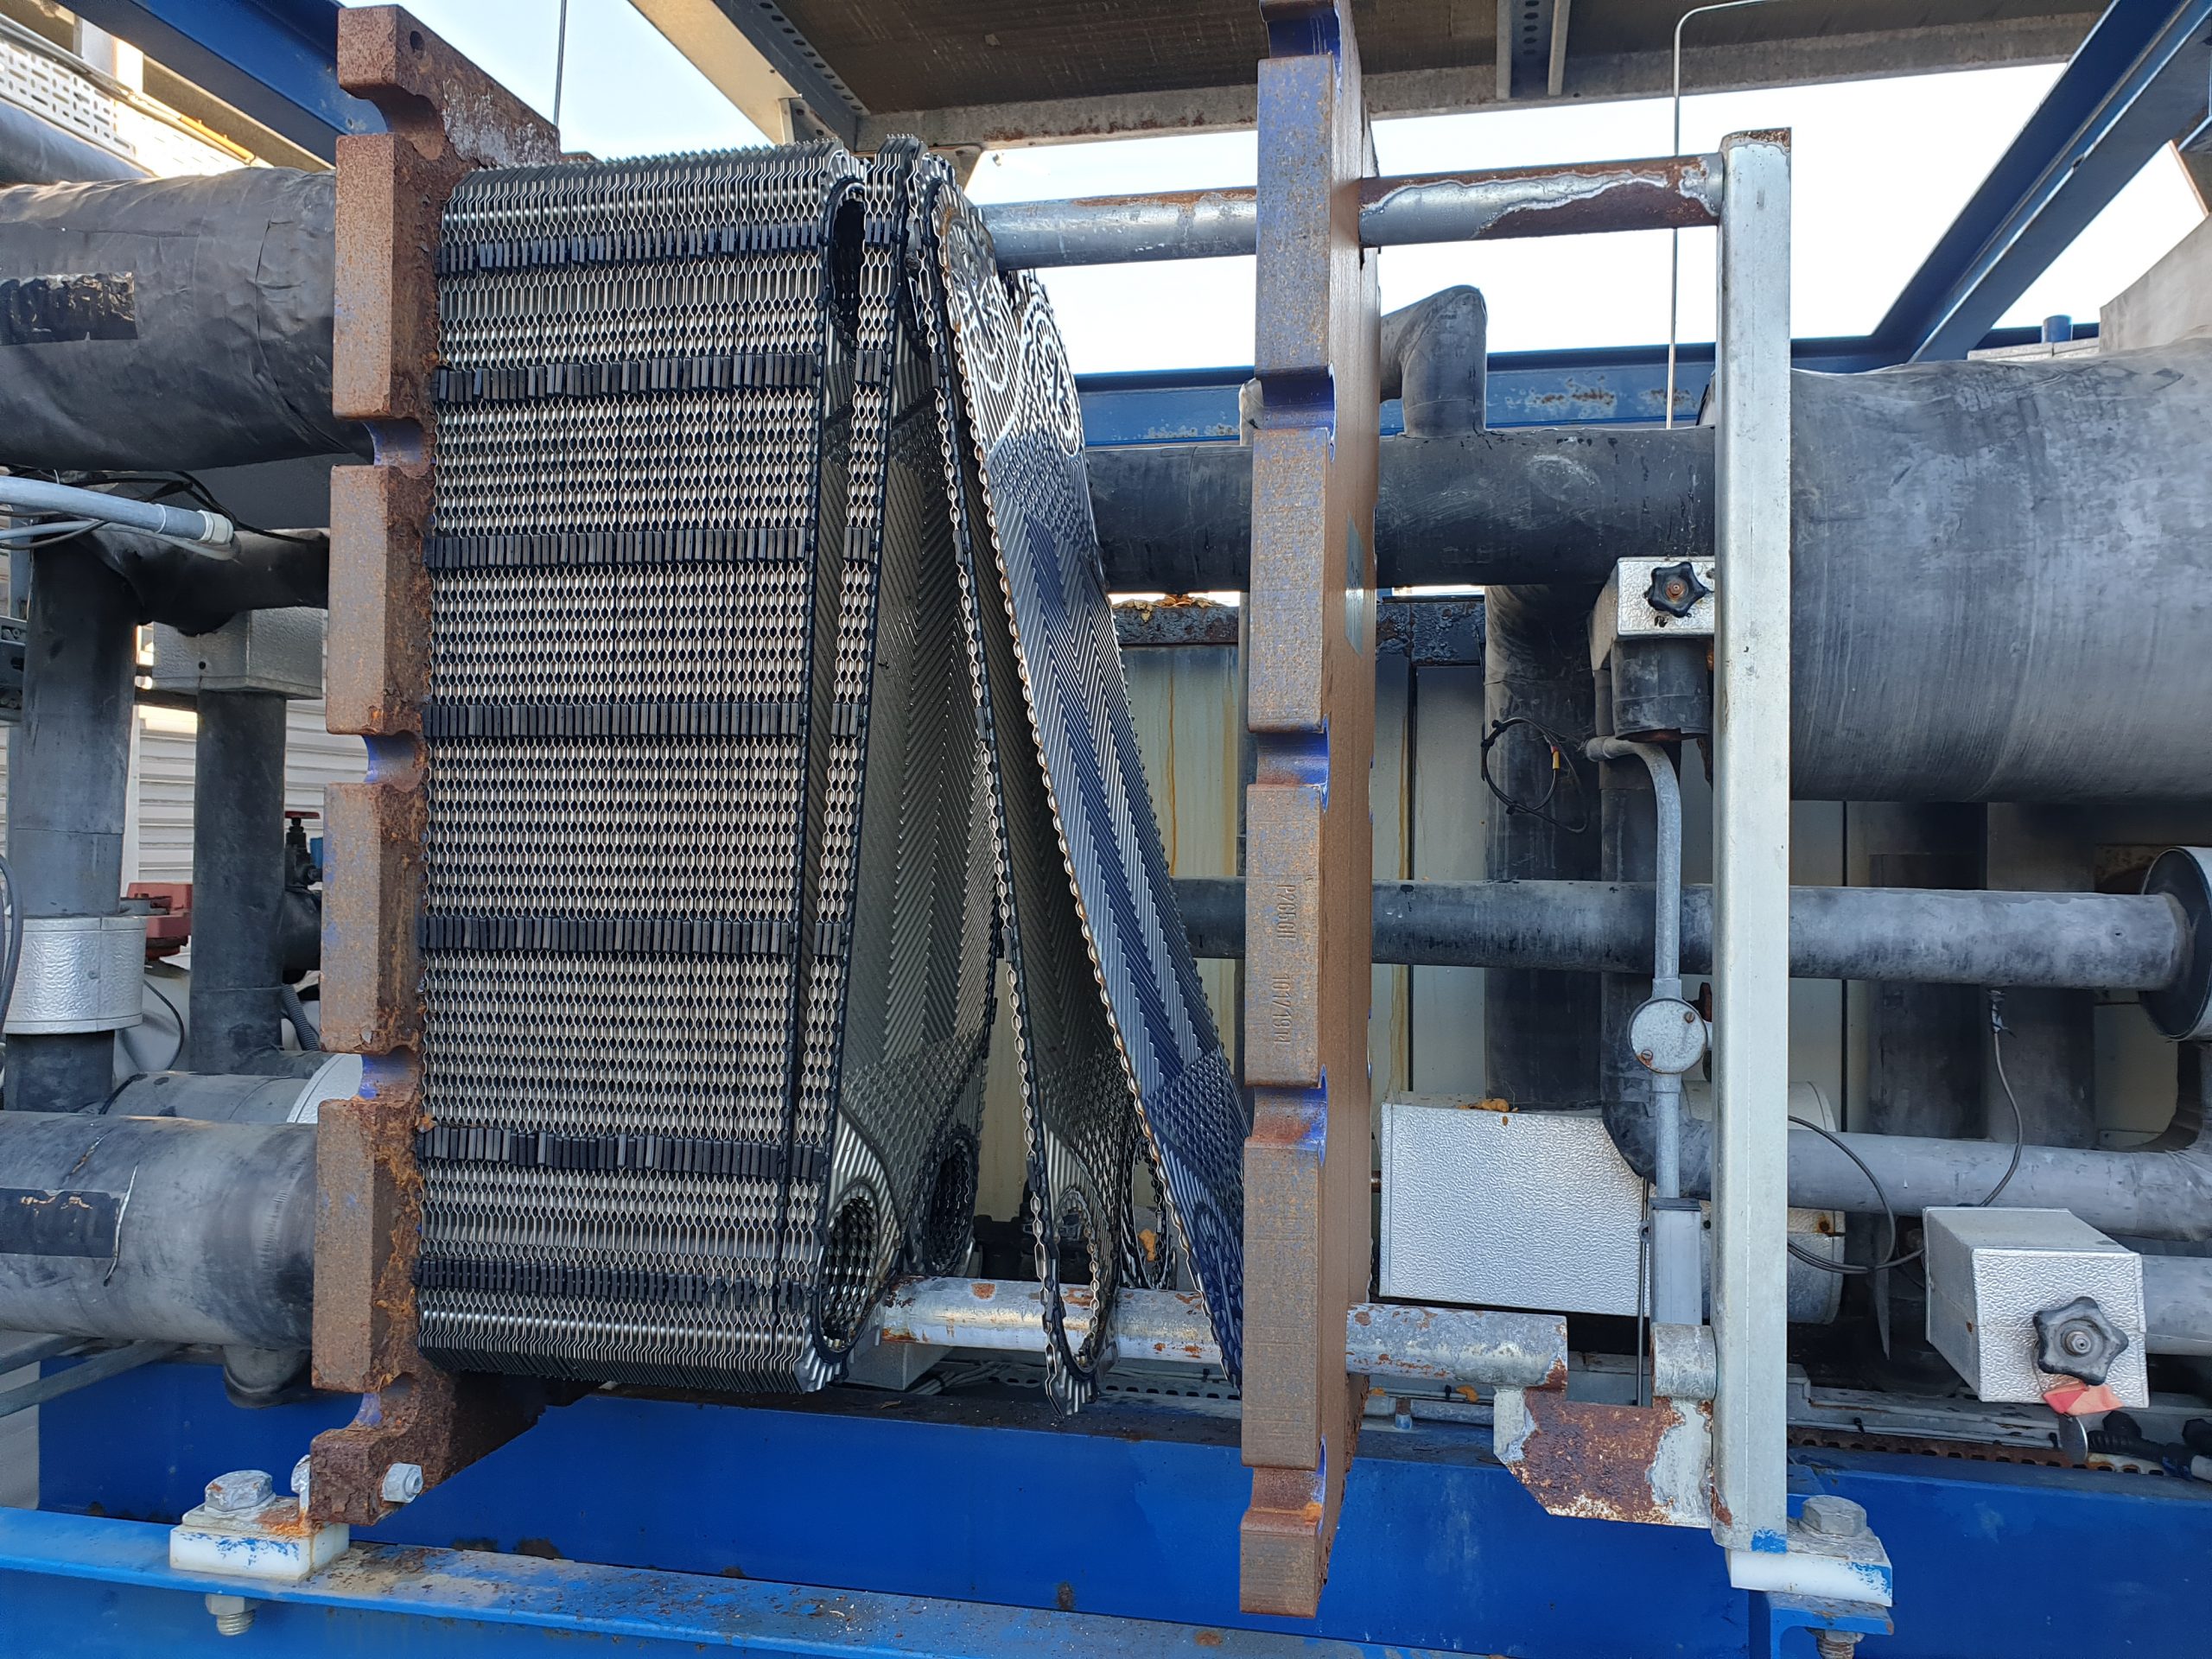
Evaporator Strip Down during Ammonia Chiller Repair
The end plate was unbolted from the rest of the evaporator according to standard industry guidelines. It was then slid to the end of the rail. Having done this, the plates and gaskets were removed and then inspected...
Plates
The plates were found to be in good condition, so they were cleaned using our plate cleaning agent. Then, they were taken to the plant room for storage until the rebuild.
Gaskets
The gaskets were found to have deteriorated over time- causing the leak.
Evaporator Rebuild during Ammonia Chiller Repair
We made the gasket set in our workshop from raw materials suitable for ammonia. Then, we sent them to site for the rebuild. The rebuild was the reverse of the strip down: the plates were collected from the plant room and replaced on the evaporator using the new gaskets.
Torque Wrench
The end plate was lifted into place and the bolts were fitted. Then, the bolts were ‘torqued up’ to the correct value according to standard industry guidelines.
Oil Filter
The oil filter which is fitted to the oil pipe on the compressor was blocked due to the moisture reacting with the ammonia refrigerant and turning into ammonium hydroxide. Our Engineer used his socket set to remove the filter housing, then he slid out the oil filter. Spares are kept on site in the stores- so the oil filter was swapped out.
Pressure Test
Having closed all of the service ports, the entire system was pressure tested, noting the start and the finish readings. These readings were witnessed by the customer and recorded on the Pressure Test Certificate which was then filed by the Facilities Manager.
0161 237 3727
service@maximuschillers.com
Dehydration Process during Ammonia Chiller Repair
The standing and running refrigerant pressures are both higher than the water pressure of the Inlet and Outlet pipes. Therefore, only a small amount of water had entered the refrigerant pipework during the evaporator leak.
Industrial Vacuum Pump
Smaller vacuum pumps need to be repaired, usually each morning, due to the moisture being removed from the system. We at Maximus Chillers have an industrial vacuum pump which speeds up the dehydration process. This unit can cope with a higher amount of moisture removal, therefore removing the need for monitoring during the process.
Set Up
Our engineers used their fittings to connect the vacuum pump, via a hose to the chiller. Then, the dehydration process was started. A Torr gauge was fitted to the appropriate part of the system using a ¼” hose and 2 fittings to get from one thread type to another.
Monitoring
The vacuum pressure was being monitored, at intervals, by the customer. Therefore, the customer let us know when the system pressure had reached the achievable vacuum pump pressure.
Recharge during Ammonia Chiller Repair
The block and tackle was used to winch the refrigerant to the location of the chiller, then the anhydrous ammonia was charged into the system. Having completed the recharge, the service port was valved off and all service ports checked for leaks using an ammonia leak detector.
Start Up Procedure
All readings including superheat, subcooling and economiser subcooling are available on the chiller controller. After the start up checks had been carried out, the start up procedure was commenced including checks to the chiller panel in the plant room and enabling the chiller on the BMS.
Run Testing during Ammonia Chiller Repair
There was available load for the chiller, so this enabled a full run test at 100%. The chiller loaded steadily until it reached full load. As the set point was neared, the controller unloaded the compressor to match the load which was coming from the building. After an hour, the chiller achieved set point, counted through an off cycle timer and then continued to run seamlessly.
Related Articles:
Industrial Refrigeration Ammonia
Shell & Tube Chiller Evaporator Maintenance
Hit the Tags below to navigate your way to our extensive library of further reading on this subject.
Read more about Plate Heat Exchangers on Wikipedia.